
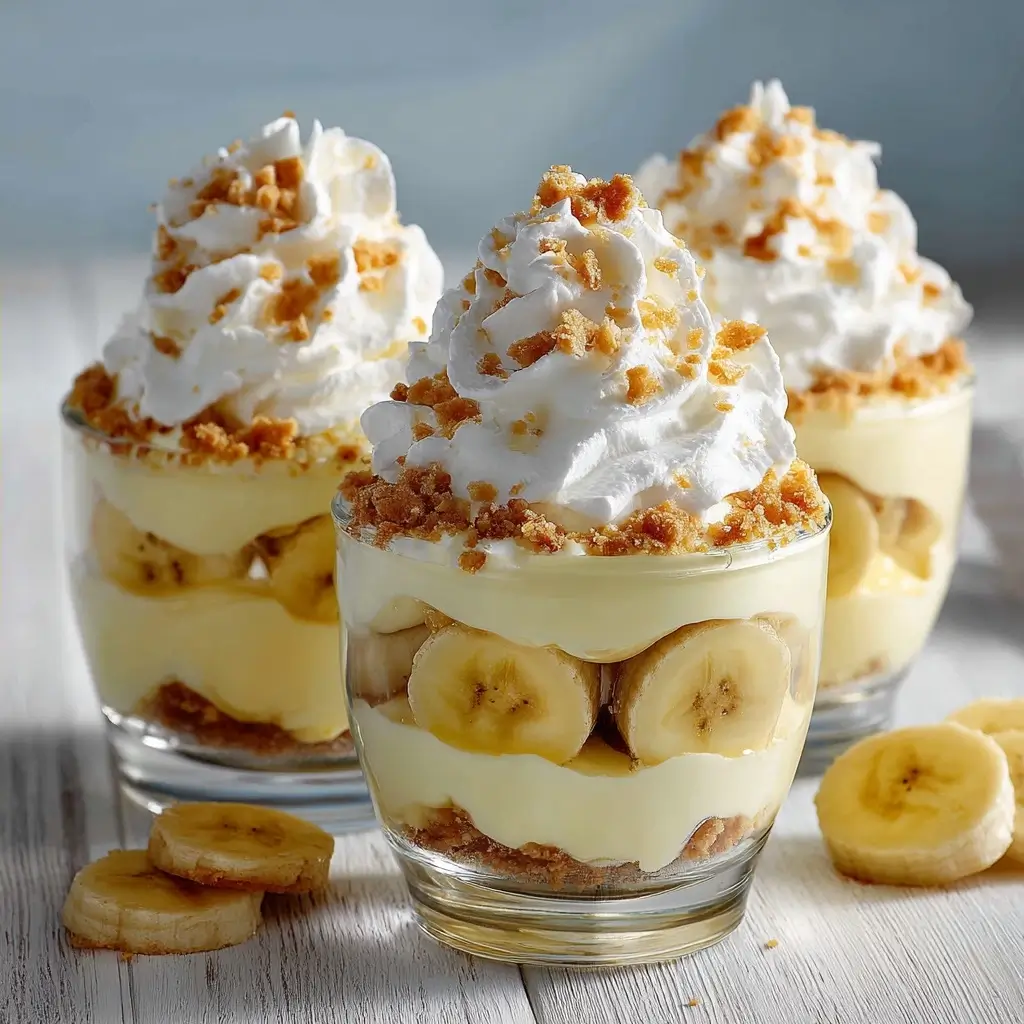
These banana pudding cups are one of my favorite no-fuss desserts for warm-weather gatherings. They are creamy, cool, and easy to assemble ahead of time, which makes them perfect for summer parties.
Banana Pudding Cups
Ingredients
- 2 3.4-ounce packages instant vanilla pudding mix
- 4 cups cold milk
- 8 ounces whipped topping thawed
- 4 bananas sliced
- 2 cups vanilla wafer cookies crushed
- 1 tablespoon fresh lemon juice optional
Instructions
- Step 1: Make the puddingWhisk the pudding mix and cold milk together in a large bowl until smooth and thickened. Let it rest for a few minutes so it reaches a soft, spoonable texture.
- Step 2: Fold in the whipped toppingGently fold the whipped topping into the pudding until the mixture looks light and creamy. Take your time here so the filling stays fluffy.
- Step 3: Slice the bananasPeel and slice the bananas right before assembling. If you like, toss them lightly with a little lemon juice to slow browning.
- Step 4: Layer the cupsAdd a spoonful of crushed vanilla wafers to the bottom of each cup. Top with pudding, banana slices, then another layer of cookies and pudding until the cups are filled.
- Step 5: Chill and serveCover the cups and chill them for at least 1 hour. Right before serving, add a cookie piece or a few banana slices on top for a pretty finish.
Notes
Why You’ll Love This Banana Pudding Cups
These little cups have everything people love about classic banana pudding, soft banana slices, creamy filling, and crunchy cookies in every bite. They look charming on a party table, and individual portions make serving simple.
Banana Pudding Cups Ingredients & Substitutions
- Instant vanilla pudding mix, for the creamy base, use an alcohol-free vanilla pudding if needed
- Cold milk, to help the pudding set
- Whipped topping, for a light and fluffy texture
- Bananas, sliced just before assembling for the best flavor
- Vanilla wafer cookies, for layers and garnish
- Fresh lemon juice, optional, to help keep banana slices bright
If you want a slightly richer filling, you can fold in a little cream cheese before layering. For a more home-style finish, use extra crushed cookies on top instead of a whipped topping swirl.
Step-by-Step Instructions to Make Banana Pudding Cups
Step 1: Make the pudding
Whisk the pudding mix and cold milk together in a large bowl until smooth and thickened. Let it rest for a few minutes so it reaches a soft, spoonable texture.
Step 2: Fold in the whipped topping
Gently fold the whipped topping into the pudding until the mixture looks light and creamy. Take your time here so the filling stays fluffy.
Step 3: Slice the bananas
Peel and slice the bananas right before assembling. If you like, toss them lightly with a little lemon juice to slow browning.
Step 4: Layer the cups
Add a spoonful of crushed vanilla wafers to the bottom of each cup. Top with pudding, banana slices, then another layer of cookies and pudding until the cups are filled.
Step 5: Chill and serve
Cover the cups and chill them for at least 1 hour. Right before serving, add a cookie piece or a few banana slices on top for a pretty finish.
Tips for Success
Use bananas that are ripe but still firm, since overly soft bananas can turn mushy in the cups. Assemble the dessert close to serving time for the best texture, or chill it only a few hours ahead if you want the cookies to stay a little crisp.
If you are making these for a crowd, prepare the pudding filling and cookie crumbs separately, then layer everything in the cups a little later. That keeps the presentation neat and fresh.
Variations of Banana Pudding Cups
You can switch up this dessert in a few easy ways. Try adding sliced strawberries between the layers, using graham crackers instead of vanilla wafers, or topping each cup with toasted coconut for extra flavor.
For a more decadent version, add a drizzle of caramel sauce. If you prefer a lighter version, use extra fruit and fewer cookies.
Serving Suggestions: What to Pair with Banana Pudding Cups
These cups pair well with grilled foods, picnic sandwiches, or a big spread of summer party snacks. They also fit nicely alongside fruit salad, lemonade, or iced tea.
For a dessert table, serve them with brownies, cupcakes, or a chilled pie so guests can choose their favorite treat.
Storage & Reheating Instructions
Store the assembled cups covered in the refrigerator for up to 2 days. The bananas may soften over time, so they taste best on the first day.
This dessert is meant to be served cold, so there is no reheating needed. If you want to prep ahead, keep the layers separate and assemble them shortly before serving.
Memories Made Around the Table
Recipes like this always remind me of summer gatherings where everyone wants something sweet but not too heavy. A tray of little dessert cups feels welcoming, easy, and just special enough for sharing.
FAQs
Can I make banana pudding cups ahead of time?
Yes, you can make them a few hours ahead and keep them chilled. For the freshest texture, add the banana slices and top garnish closer to serving time.
Can I use homemade pudding instead of instant?
Absolutely. Homemade pudding works beautifully if you prefer a richer flavor and have a little extra time.
How do I keep the bananas from browning?
Slice them just before assembling and lightly toss them with lemon juice if desired. Chilling the cups promptly also helps slow browning.
Can I use a different cookie?
Yes, shortbread cookies, graham crackers, or another mild vanilla cookie can work well. The flavor will change slightly, but the dessert will still be delicious.
Final Thoughts
These banana pudding cups are simple, nostalgic, and perfect for feeding a crowd without stress. If you need a sweet summer dessert that looks lovely and comes together fast, this one is always a good idea.